3 ways to carefully remove tiles from the wall in the bathroom
Content:
Among fans who want to make repairs with their own hands, disputes about how to dismantle old tiles in the bathroom do not subside. Each home master offers its own algorithm. Let’s try to step through this procedure step by step, dispel myths and propose the best solution.
Assessment of the quality of the old coating
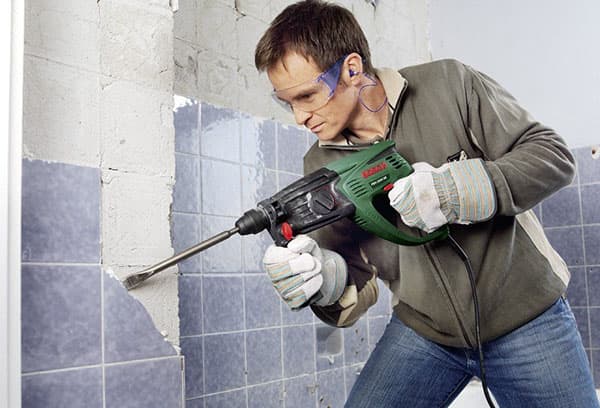
The dismantling process directly depends on how the old coating was laid. Cement-based mortar mixtures provide much stronger adhesion to the base than glue. In this case, to remove the tile from the wall, you will need a hammer drill and certain skills to work with it.
If the tile is laid on ordinary glue, everything is much simpler - a hammer and a chisel are enough. With a great desire, the old tile can be saved, but for this you will have to do everything very carefully.
Preparing for the dismantling process
Do not forget that any dismantling is always accompanied by a huge amount of dust and fragments. In the bathroom, this is especially important, since modern plumbing is made of fragile materials that are easy to damage. Therefore, you need to prepare for the release of the walls from the old tiles.
- We cover the floor with plastic wrap in 2 layers.
- We protect all fragile surfaces - a bathtub, toilet bowl, sink, etc. - with soft linings (you can wrap them with unnecessary rags, an old towel or blanket) and cover with a film.
Tip
All further work should only be carried out using personal protective equipment: a respirator, a protective suit and special glasses. Hands should be protected by gloves and feet should be worn in closed shoes with a hard toe.

Dismantling process
The first thing you need to do when getting started is to find a weak spot in the extreme top tile on the right (for left-handed people, mirror all instructions). To do this, gently tap its surface with a hammer. Finding the voids, with the help of a chisel and a hammer, we chip a piece of the product.
Tip
It is advisable to tap the entire surface and places with voids to dismantle first. Otherwise, it may suddenly collapse (sometimes in whole sections).
If no voids are found, the cutter needs to cut the tile diagonally, completing further dismantling with a hammer and a chisel.
Once the first plate is removed, the rest of the process will go easier. Here is a step-by-step guide.
- Wet the seams thoroughly with a sponge dipped in warm water. Let the grout paste soak.
- Remove grout paste from the joints without damaging the edges (a spatula or screwdriver is convenient for this). The first to remove the top row - and so on in order to the very bottom. The more thoroughly this step is carried out, the easier the further process will go.
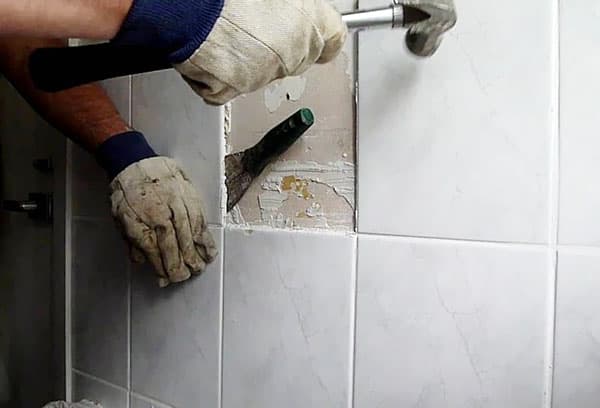
- The chisel is inserted into the seam between the top and the next row so that you can pry the top tile. It is important to feel the right angle, usually it is about 450. The chisel acts as a wedge between the wall and the coating. First we try to slip a chisel and make a small recess in the wall approximately in the middle of the tile end, then left and right (closer to the edges of the product). Having made the recesses, palm off the chisel in the middle again.
- Prying the tile, we separate it from the wall. This is not always easy and the first time. Then a hammer comes to the rescue. You need to hit the chisel several times, each time slightly increasing strength. At the same time, you need to try to remove (tuck) the tile from the wall.Sooner or later it will yield - or only a piece will break off. In the latter case, you should again use the torch. We cut the remains of the old tile diagonally and with a chisel (in extreme cases, a perforator) we finish the matter.
Tip
Masking tape glued in several layers will protect the edges of the tile from damage, and it can be used in the future.
- If the task is not to preserve the ceramic tile, the work can be done much faster using a hammer drill with a special nozzle. In this case, it is advisable to dismantle from top to bottom and from left to right. The use of power tools significantly speeds up the process.
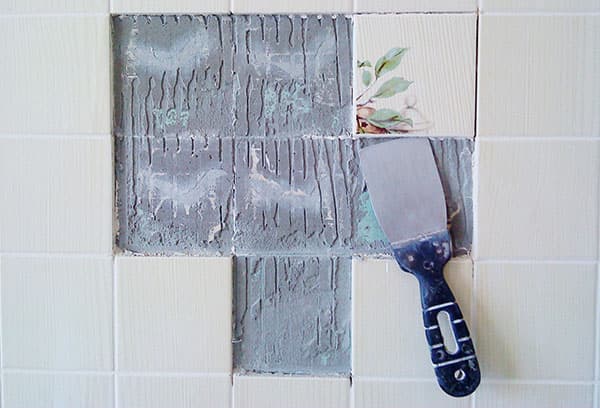
- After dismantling the ceramic coating, glue or mortar remains are removed using a scraper. There are special formulations that facilitate this work.
The cleaned surface of the wall is treated with a deep penetration primer, and after drying, the surface can be used for further finishing.
Especially difficult cases
In some cases, it is not possible to dismantle the tiles in this way. Let's consider them in more detail.
Dismantling tiles from a drywall wall
If the tile was laid directly on drywall, then knock it down will not work. Have to completely dismantle the partition. But there are situations when a wall made of drywall was first plastered, and only then a layer of tile was laid. In this case, there is a chance to remove only the coating.
Step-by-step instruction
- Remove grout with a knife or spatula. It is important to completely clean the seam.
Tip
If the seam cannot be cleaned, you can slightly incise it with a grinder at an angle of 450 to the center of the tile and remove residues with a spatula. The depth of cut should be 1–2 mm greater than the thickness of the tile, otherwise it will crack when dismantled. The assistant at this moment turns on and holds the vacuum cleaner, which sucks the dust, preventing it from scattering throughout the room.
- Soak glue or cement mortar with warm soapy water.
- Pry off the tile with a chisel or chisel and carefully remove. The tile is removed along with the plaster, the residue is quickly cleaned with a scraper.
- Carry out a primer and putty of drywall.
This method will help to maintain the partition, reducing the complexity and lowering the cost of dismantling.
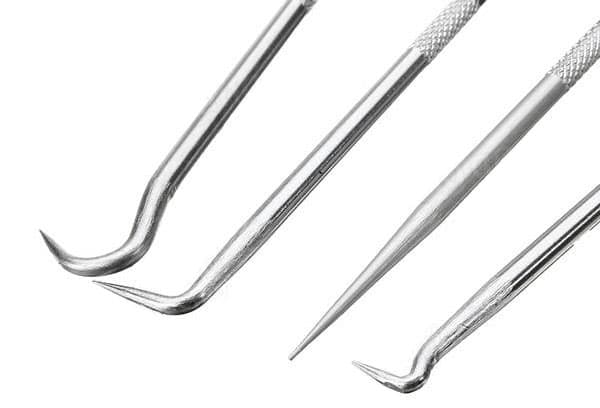
Dismantling tiles with metal hooks
Use a chisel and a hammer, and even more a puncher, it is convenient not everywhere. In hard-to-reach places, two metal staples made of old screwdrivers or knitting needles bent by the letter P. will help.
After the seams are cleaned and the surface under the tile is wet enough, stick one edge of the hook under the tile below and the edge of the other hook on top and pull it towards you. This method is especially convenient when the tile was laid correctly with special glue. And also it will help not to spoil the appearance of the product and will make it possible to use finishing material in the future.
Safety precautions
When disassembling, it is very easy to get injured or damage communications in the wall. To avoid this, the following rules must be observed.
- Clarify the location of pipes and other utilities, especially wiring, and observe these precautions as carefully as possible. Use under these conditions is strictly prohibited. Dismantling is preferably carried out using special metal brackets.
- The punch body must be made of dielectric material to completely eliminate the possibility of electric shock.
- Personal protective equipment will save from dust and tile fragments. When working, be sure to use gloves, goggles, special clothes and shoes, and when working with a hammer or grinder, a respirator.
- During the performance of work, no strangers should be in the room, and the door should not be closed.To prevent dust from entering neighboring rooms, you need to hang the opening tightly with a wet sheet - it will not interfere with air exchange, but all the dust will remain on it.
Removing residual mortar and glue
A scraper will help to clean the surface of the tile for reuse, as well as remove the remnants of the mortar and glue from the walls. First you need to wet the surface well. Tiles are even recommended to soak in water for several hours. Use preferably warm water with soap dissolved in it.
But soap solution will not cope with cement mortar. To soften it, use salt, which makes the cement loose, destroying its crystal lattice. Final cleaning is carried out with a metal brush. On sale there are special solutions that will greatly facilitate the process.
Having mastered the basics, it is easy to dismantle ceramic tiles with your own hands, not only in the bathroom, but throughout the apartment. For example, the apron in the kitchen is similarly dismantled.