Learning how to dry flowers and leaves for a herbarium
Content:
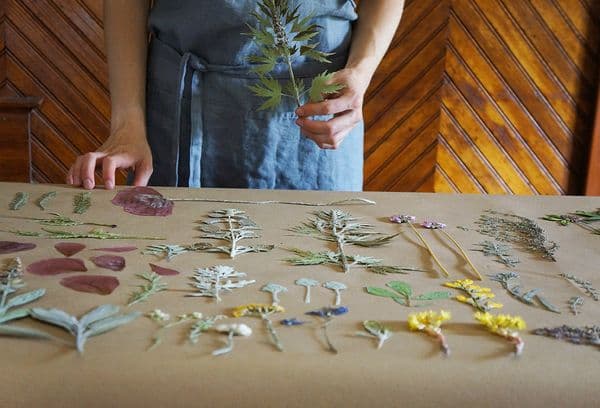
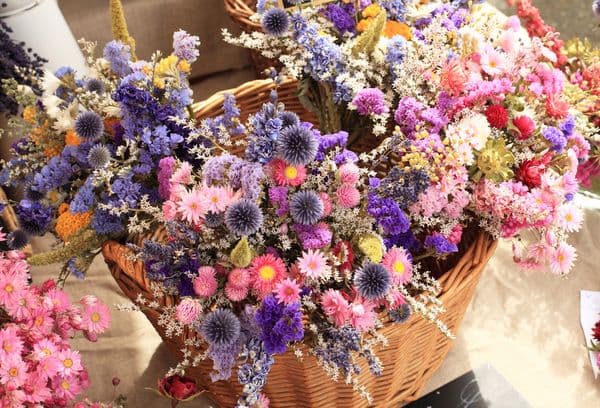
Quite often, students receive a task for the summer - to collect their own herbarium. Finding the material for this is usually not a problem, but not everyone knows how to dry flowers and leaves for a herbarium. On the site purityis.decorexpro.com/en/, we have put together the most reliable and simple ways to flawlessly cope with this task.
Collection rules
It all starts with the procurement of material. Before drying the herbarium, you need to collect leaves and flowers. It is very important to choose the right time. The best option is warm, sunny weather in the lunch area. Remember that there should be no dew or rainwater on the leaves and flowers. Otherwise, they will not dry quickly. And this will quite easily lead to mold and hopeless damage to the prepared material.
Of course, it is recommended to choose only healthy plants, without signs of illness or leaves damaged by insects. Otherwise, the herbarium value will decrease significantly.
It is also worth remembering a few simple rules:
- Small plants are collected whole - along with the roots and stem.
- From the bushes you can take a branch. It is desirable to cut it, and not break it, in order to minimize the damage to the plant.
- With dioecious plants, it is necessary to take male and female specimens. When working with monoecious flowers, collect stamen and pistil flowers.
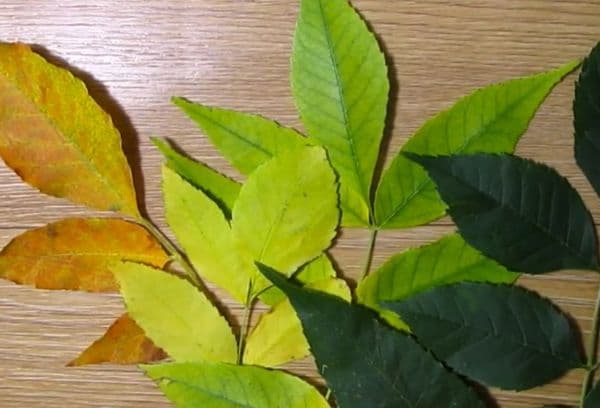
- When working with trees, it makes no sense to take a branch. It is enough to cut leaves, flowers and, if possible, fruits - all this will make it possible to make the most complete impression of the plant, it is easy to identify it.
When the materials are collected, it's time to start drying. There are several options to save plants. We’ll tell you about each, so that readers can easily choose the one that suits them best.
Iron Drying
This option requires the greatest caution and, moreover, cannot pass without human intervention. But it allows you to quickly cope with the task.
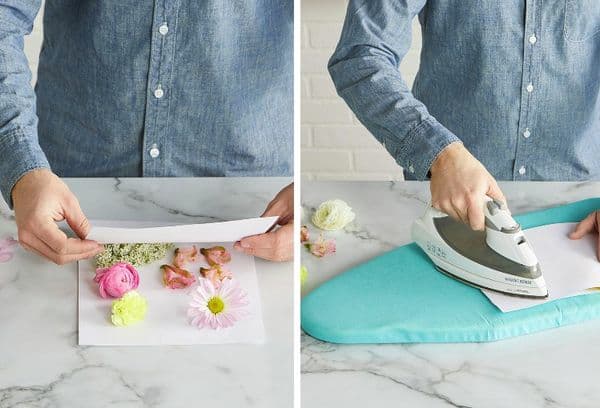
Tip
This option will be a good choice for people seeking to preserve bright flowers, not allowing them to lose saturation and richness of shades.
How to dry plants with an iron:
- To get started, prepare a smooth, hard surface. A dining or kitchen table is suitable. In order not to damage the countertop with a hot iron, it is advisable to spread a thick, dense fabric on it. You can use the usual bedspread from a sofa or chair, folded several times.
- Put paper on top of the bedspread - preferably with a margin so that the plants do not go beyond its edges.
- Put botanical material on top and cover with paper. If the branch or grass is long, then lay the paper thoroughly lapped. Then between them there will be no gaps through which the iron can damage the material.
- After warming up the iron, start ironing the paper. Do this carefully and without strong pressure so as not to damage dried leaves and stems.
- After a couple of minutes of ironing, remove the top layer of paper and check if the plant is dry. If not, continue.
Dry under the press
If you are not too limited in time, then it is easiest to dry plants under pressure. At home, this role is most often played by a thick book.

It will take at least a week to dry, and if fleshy, thick leaves were used, then more.
Instruction:
- Take leaves and a thick book.
- Put paper on the open page, plant on top, and cover with another layer of paper on top. Lay out the small parts next to fill the page.
- After turning 10-20 pages, repeat the procedure.
- Continue until leaves or book run out.
- Now close the book and either put it in a cramped row of other volumes, or put it on a shelf, and on top - a couple more weighty editions to increase the load.
- Change sheets of paper every day - they absorb moisture and because of this the drying process is delayed. Using dry paper saves you time. In addition, at each replacement, check to see if the plants have dried out and mold has gone - this also happens.
- Take herbarium blanks not all at once, but gradually, as they dry.
Powder drying
Another interesting and little-known method is drying in semolina, river sand or crushed chalk. The process takes a lot of time and is generally not too convenient. But unlike the ones described above, it allows you to save the plant in its original form - with leaves and stems unfolded in different planes. The resulting dried flowers will please you all year round and are perfect for exquisite exhibitions.
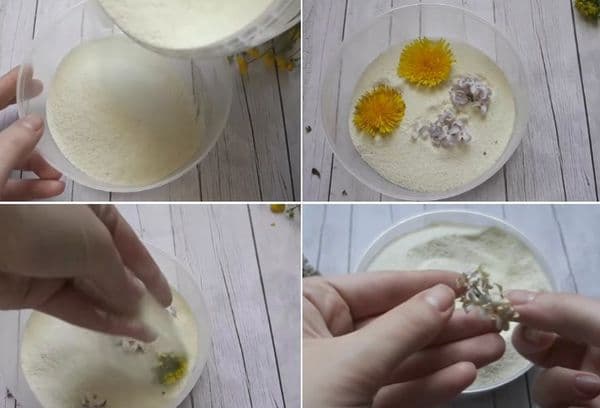
Important
When using chalk or semolina no pre-treatment is needed. But it is advisable to calcine the sand in a pan so that it becomes as dry as possible. After that, get to work.
Procedure:
- Pour sand, semolina or chalk into a box of a suitable size - about 2 cm thick.
- Lay the plant on top.
- Gently fill with powder, evenly distributing it, so as not to wrinkle and deform leaves, flowers.
- In this state, the flowers will have to dry for about two weeks.
- After the time has passed, carefully make (with scissors or a clerical knife) several holes in the bottom of the box and allow the powder to spill out into a suitable container.
Looking inside, you will see a perfectly dried plant that has retained its natural form. It remains only to shake off the remnants of dust from it and you can begin to create a bouquet.
We create decorations with flowers
Often, not only people gathering flowers for herbarium are involved in the harvesting of plants. Some masters are interested in preserving them and making exquisite jewelry, for example, a brooch with a flower of dandelion, chamomile or dog rose. You need to know how to cope with such a task.
To start, the flowers are simply dried - using any of the above methods. Most craftsmen use books or a press assembled with their own hands from two thin plates and several bolts with nuts.
The main work consists of several stages:
- Selection of the basis. It can be a blank for a brooch or a small plastic container - at your discretion.
- Preparation - a white background is laid on the bottom. Someone uses polymer clay, while someone simply applies white enamel paint. In any case, let the material dry.
- Using glue, fix the flower. It is not necessary to apply a lot of glue - just one drop is enough, just so that the element does not move during further work. It is advisable to use quick-drying glue. It allows you to save at least a few hours.
- Pouring epoxy. Sometimes a small formwork is equipped around the flower so that the resin does not spill over. Fill the epoxy with a very thin layer, trying not to get on the petals. Then their shape will be more natural and attractive.
- Removing air bubbles. The easiest way to cope with them is with a needle - the voids are carefully adjusted to the surface and pierced. However, experienced craftsmen rarely appear with bubbles.
- After 48 hours, the epoxy will gain sufficient strength so that the decoration can be used. Transparent like water, it creates the illusion that a flower is stuck in a drop of dew.
As you can see, the process of drying leaves and flowers can be not only simple, but also quite interesting. Follow the simple rules to get the perfect option.