DIY valve repair, lever and half-turn mixer
Content:
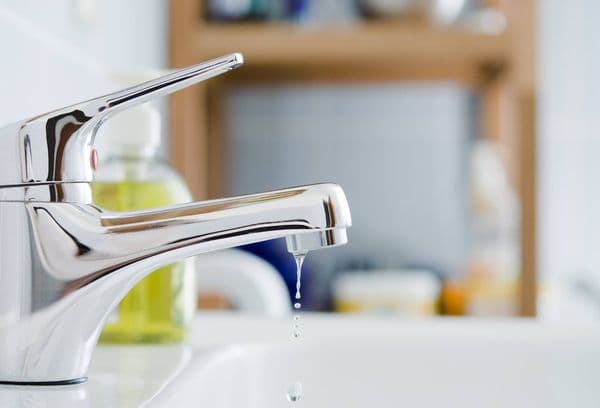
The current tap in the kitchen or in the bathroom is an annoying sound, damage to the wallet and the status of the owner of the house. It is not difficult to repair the crane if you know how to disassemble the mixer and what to do with the crane-axle box. All that is needed is a screwdriver, a gas wrench, 9% vinegar and, in case of severe wear, a spare valve head.
Why is the tap leaking
Actually, there are only two reasons for leaking:
- wear of parts (rubber seals are worn, torn, become inelastic, closing mechanisms are less worn out);
- clogging with dirt, rust, lime and water stone, mucus, etc.
The last reason is the most common. Tap water in most cities is hard and relatively dirty, over time, various impurities settle on the valve box and prevent it from sealing the water flow. This problem equally often affects worm, and ceramic (disk), and ball mechanisms.
Tip
At first glance, clogging does not threaten the tap of the flow filter. In practice, it is not possible to change the cartridges exactly on time, and for several years lime accumulates on the spout of the crane and in the axle box.
Gland wear is a real curse for worm valve heads, because tightness depends on the density with which two rubber glands converge after tightening the valve. Over time, they lose elasticity, if caution is not constantly observed, the gasket breaks, especially with a strong pressure of water in the tap.
purityis.decorexpro.com/en/ recommends giving preference to valves with disk boxes. Even a complete replacement will cost only 100-200 rubles, but this will be required no more than once every 5 years. The leakage of such axle boxes is most often eliminated by washing off dirt and limescale.
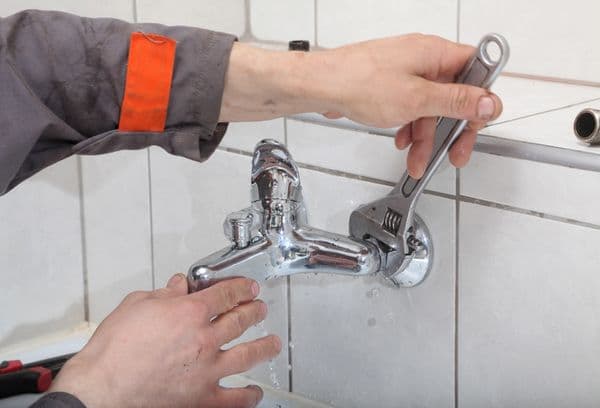
What to do with the valve
The old taps were two-valve type. And today, many have such faucets (for example, Frap brass), especially if the bathroom is decorated in a vintage style.
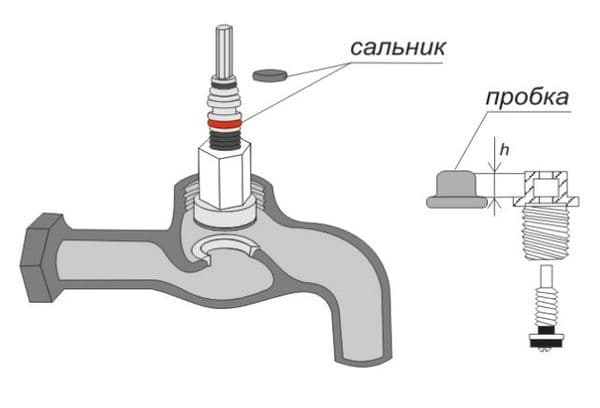
Step-by-step instructions on how to disassemble:
- Pry off the plug at the end of the valve with a fingernail, screwdriver or other flat object. On many models, it is unscrewed (with hands or pliers).
- Loosen the safety screw.
- Remove axle box / valve. If she has become stuck, use a wash in the spray, but usually it is enough to tap the valve slightly, pushing it up.
- Unscrew decorative clutch.
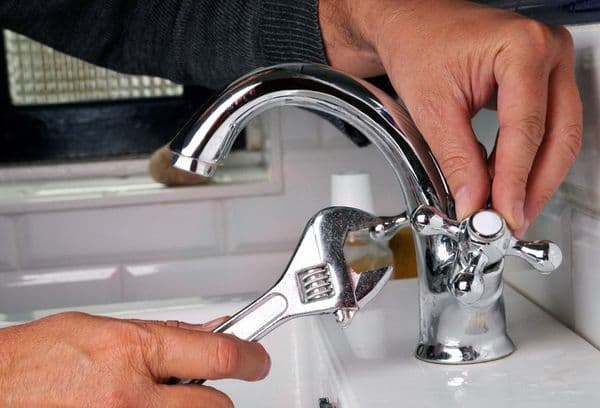
- Unscrew the fixing nut with a plumbing or large adjustable spanner.
- Take out valve head.
Tip
The fastening nut must be fully tightened, but not too tight, otherwise the crane-axle, being too tight, will fail more quickly.
Both in the bathroom and in the kitchen the procedure is the same. The difference in the location of the valves. Another difference is the switch between the faucet and the shower, which can be of different types, but most often the ball (the switch itself can be a lever or valve) and cartridge.
How to fix a shower / faucet ball switch:
- Unscrew the valve or remove the valve body in the usual way.
- Unscrew the nut and remove the hose or “telephone” - stand with hose and watering can holder.
- Pry off with a screwdriver and pull out rubber gaskets, if any.
- Use a 10 mm hexagon socket wrench (the solution at hand is to insert and unscrew the pliers to lock it) to unscrew the screw coupling from the shower side.
- Remove the same screw from the crane side.
- Unscrew the fixing nut with a plumbing wrench or pliers and remove the axle box with the ball.
- Inspect carefully. If the part is overgrown with calcareous deposits and other dirt, soak and wash.
- Very often, the reason is the wear of the seals on the coupling screws. They look like rings with a bevel that goes inside the screw. These parts are inexpensive and sold separately. If they are worn out, it is worth buying them, and not changing the whole axle box.
- Sometimes the cause of the leak is the wear of the rubber gaskets on the stem of the axle box itself - to repair the ball, it is necessary to separate the ball from the stem and replace the seals.
- Reassemble everything in reverse order.
Important
For ball switches, calibration is crucial. The stem of the axle box should stand strictly horizontally, and the coupling screws should grip the ball tightly, but not tight, otherwise all four glands (on the axle box and on the screws) will wear out quickly and the valve will often leak.
Filter tap
The small faucet for the drinking water filter is available in two versions: the switch handwheel is mounted directly on the mixer or on the coupling (faucet version 3 at Aquaphor, faucet No. 6 bio from Geyser).
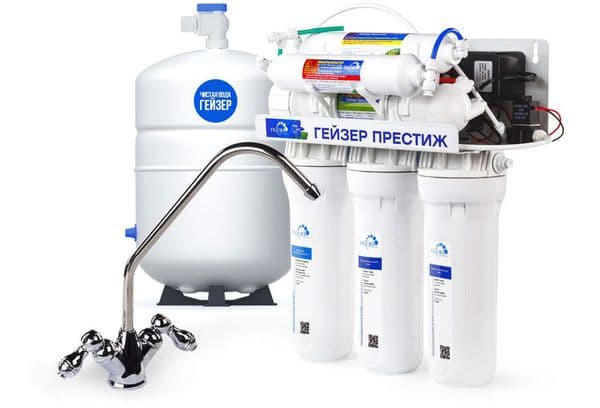
Fig. one
How to disassemble the crane of the last type:
- Unscrew flywheel from clutch.
- Remove the coupling.
- Unscrew the axle box.
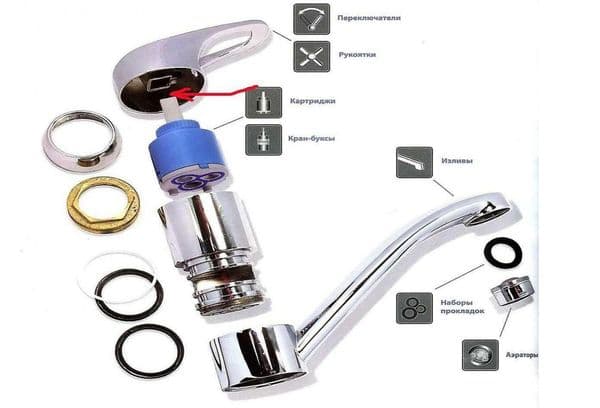
How to restore a lever crane
Increasingly, in kitchens and bathrooms, valves are giving way to single lever mixers. They allow you to quickly open or close the water, adjust the pressure and temperature.
As a rule, there is a cartridge inside the “one-armed” kitchen faucet. Unlike a conventional axle box, it is most often not serviced and is simply replaced in the event of a breakdown.
How to disassemble the flag tap:
- Raise the lever plunged.
- Remove the plastic plug (often it is painted in blue and red to indicate hot and cold water). At Blanco this plug is located on the back of some models.
- Unscrew the locking screw with a socket wrench.
- Remove the decorative ring (either unscrew or pry off, as in Grohe).
- On the faucets Damixa you need to immediately remove the decorative cap, then pry off with a screwdriver and uncheck the box.
- Release cartridge. More simple faucets, for example, Vidimaplastic mounting nut. It is better that it was metal - it has a rather large load. Such at Frap F4128, Ledeme, Eskothey are removed with a plumbing wrench, adjustable spanner. “Groe” and “Blanco” have this nut - with two slots, it needs a special key with two “mustaches”, which usually comes with a mixer, but it also happens in the arsenal of cyclists.
- Blanco needs to completely disassemble the mixer by removing the body, two o-rings open on the remaining pipe - they can wear out and cause leakage. In this case, they need to be replaced with new ones. The manufacturer recommends lubricating the oil seals with branded waterproof grease to reduce wear.
- For most faucets, the mixer is not collapsible, but a leak occurs at the junction with the sink. There are o-rings here, which can be replaced if they warp or harden over time.
A water faucet with one handle can have a spherical box, and a ceramic-rotary, although today it is an unpopular solution. Resource purityis.decorexpro.com/en/ recommends that you carefully read the user manual before buying the device, especially if you expect to serve it without involving specialists.
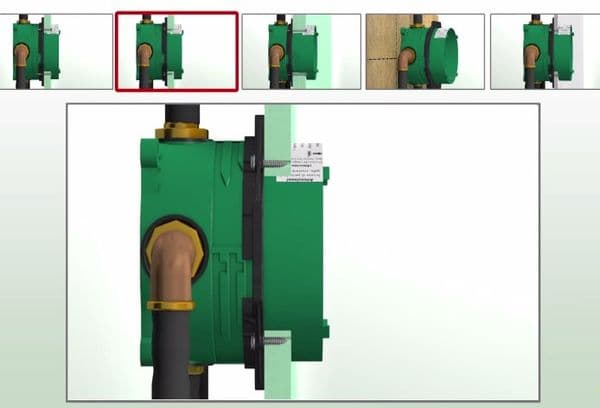
Built-in mixer Hansgrohe
This mixer is extremely convenient in the limited space of the shower. Mixers are produced in various modifications. The luxury version - with push-button direction switching (for example, to the lower tap and upper shower) and a rotary thermostat control. Instead of the latter, there may be a regulator of water pressure.
Tip
Built-in mixers need an ibox, i.e. box-case, which is mounted on the wall. When making repairs, it is necessary to provide a hole for the box and its installation in advance in order to conduct water supply hoses to it. After facing the walls, the aybox should protrude about 2 mm above the surface.
To get to the mechanism, you need to remove the front panel (this is done by simple snapping off).
The mixer is mounted on a massive mounting panel inside the iBox using four socket wrench screws.
In more detail about the installation and installation of the built-in faucets "Hanzgroe" tells the video from "Master Plus":
The range of modern faucets is huge, but the principle of their device is generally not much different. This is either a lever design with a cartridge axle, or valve with a ball or ceramic valve head. For all variants, the most common cause of leakage is clogging with limescale or mud, and oil seals wear out relatively quickly from hard water, especially on worm and ball axles.
Cartridge systems, including ceramic crane boxes, are one of the most reliable today, but in the event of a serious breakdown they usually have to be replaced entirely. If funds allow, it is worth taking a look at the built-in faucets with a thermostat, so as not to waste time setting the water temperature - this option is especially convenient in shower cabins.